Basic setup #
The entire FTP structure is taken from the “C:\ProVide” folder on disk.

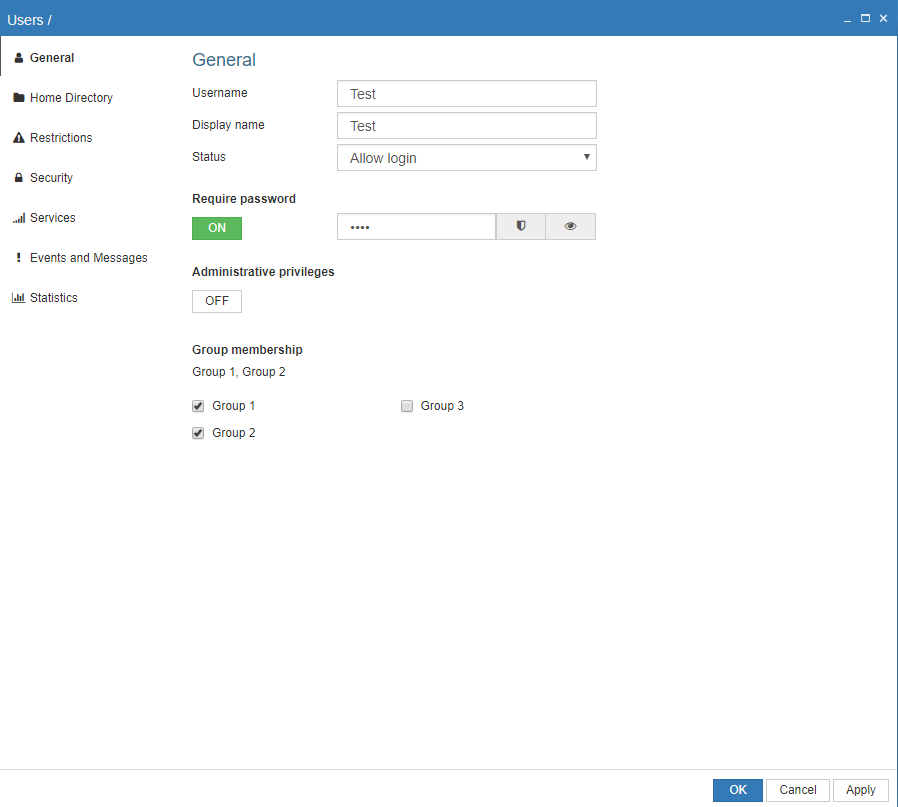
Managing web accounts #
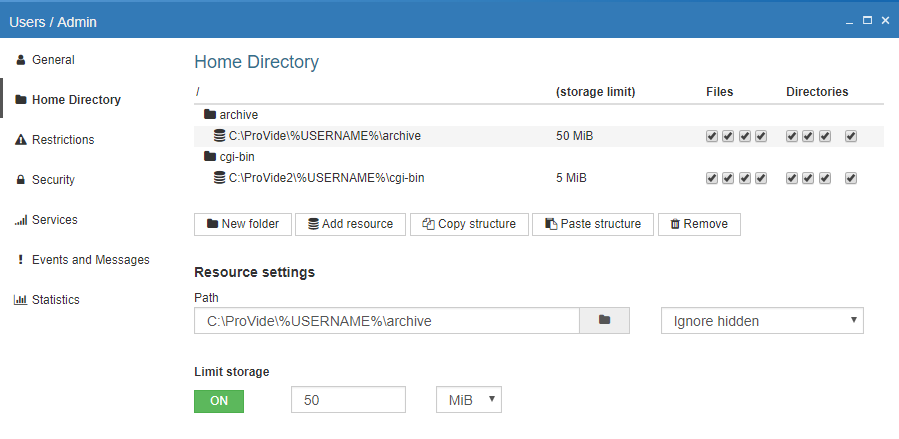
The following group account is created and by simply assigning membership to this group when creating new accounts the management of a huge amount of accounts becomes a breeze. In this example there is a total limit of 50 MiB storage for each user, but the folder “cgi-bin” can never go above 5 MiB. All the necessary folders are of course automatically created on the server once the user logs in, so there’s no need to manually do anything else.
Mergin several folders #
The entire FTP structure is taken from the “C:\” folder and “D:\” on disks. These two folders get merged and look like one big disk to the user.

User specific folders #
Every user gets their own home directory automatically in “C:\ProVide\%Username%”, with full access rights.

Date specific folders #
The folder with todays date will have full access rights (available for upload), while all others are only available for downloading.

User specific upload folders #
Every user will get their own upload area with a limit of 50 MiB storage capacity, while still being able to download all files by other users.

Using several group memberships #
Create a separate group for each available project (specifying in each case which files/folders that project needs) and let each user be a member of the projects needed (this makes it very easy to e.g. manage changes).